Saturday, December 08, 2012

The Small Block Chevy in the 60's

The 1960's were great years when it came to further development of the small block. The 327,302 and 350's that were developed produced fantastic horsepower numbers never seen yet in engines of these displacements.So let's get into what happened during this decade when it came to the small blocks performance. During this decade the small block would be installed in almost every type of race car built at the time including Ferrari's,Maserati's to the American built Chaparral. Even British built Lola's were eventually built using the small block Chevy. The light weight,durability and power potential made it idea for these race cars

 
   The 327
This displacement wasn't something that the engineers at Chevy actually thought about until it came to their attention that racers were boring and stroking the 283 with suprising results. The 283's 3.87 inch bore was thought to be the limit. And considering that the original small block design was simply to accommodate 265 C.I.D. The 327 would be the first engine to be designed and built at the Chevrolet engineering Center. The first ones were tested pretty much at the beginning of the decade. After problems like core shift and oil consumption were dealt with the engine was made available for the 62 model year. The engine had a 4.00 in bore,3.25 in stoke and retained the journal sizes of 2.30 in mains and 2.00 in rods from the 283. The increased bore and stroke gave some pretty impressive horsepower and torque numbers. When the engineers started installing bigger cams,performance cylinder heads that were ported and then added the "Dog House" fuel injection they pushed the numbers up to 360 HP! This engine powered the 1963 Corvette to a 14.5 second quarter mile time. There was also no factory installed small blocks in the Chevy II's. That wasa dealership option that allowed either the 283 or 327 with the recessed oil filter boss. The 327 would top out at 375 Horsepower with the fuel injection option.

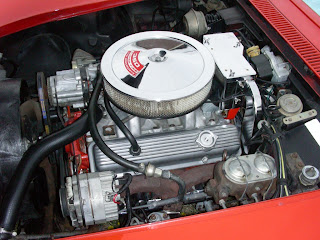
Mechanical Fuel injected 327 Small Block Chevy

While the 327 was being designed there was also work going on with another small block that actually got its start in the later part of the 1950's as a test platform for performance parts that went out the back door through SEDCO.Something put together by Vince Piggins, one of the guys that worked at Chevrolet during the time,more on him later. SEDCO was a low profile way to get newly developed performance parts out to the guys doing the racing and backyard engine building. Anyways, the 302 was actually built as this test platform using a bored out 283 prior to the 60's and by 1961 the block had enough strength to actually handle the 4.00 in bore.
There are a great many innovations that came out as a result of testing the performance including "Cowl Induction" and what is now the 'Cold Air Intake" And by this time it was well established that the term "Small Block" & "Big Block" were terms coined specifically as a result of engines built by Chevrolet. When the 302 was made available it was installed into the all new Z-28 Camaro. There was a specified amount of Z-28's made available to the puplic because it was part of the SCCA Trans Am rules. The engine was rated at 290 Horse power for the street however actual dyno numbers like 340,350,375 and 390 have been tossed around. The 302 built by Traco for the racing series dyno'd out at around 500 horsepower. And it would rev like no tomorrow making it pretty much perfect for the Trams Am series racing.

302 Chevy
Specs for the 302 went something like this,
Aluminum Intake
11:1 compression
2.02/1.60 closed chamber heads
800 CFM Holley
Forged Pistons
Duntov "30/30" Cam
Steel Forged crank
And what was known as a Tuffriding Surface treatment.

The 350 Chevy
By now with the small block's power potential reaching 365 or so horsepower the engineers at Chevy were given the task of possibly enlarging the small block even more. Now remember it was only a few years ago the 327 appeared and the engineers and testing guys felt comfortable with the displacement of the 327.  So the engineers designed and built a 3.47 in stroke crank and the 350 was born. Now when people talk about a "small block Chevy" this is the motor they're referring to. Now,along the course of the development of the block itself, the area where the crankshaft rotates had been changed a number of times and for the 350 it was no exception.By raising the lower end of the bore and making sure there was enough room inside the panrail area for the larger rotating mass. This also created the need for the main and rod jounal size to be in creased and thus the "large journal" crank was developed.

  Now back when this writer was growing up the 327 was considered the ultimate small block. This may have been a result of the 350 debuting with 295 horsepower. The smaller 327 was still cranking out 360 or so HP.  There were a number of problems that arose with the 350 after it was in production. After these issues were addressed the 350 went on debut in the 1967 Camaro. By the begining of the next decade the 350 would become the most powerful small block ever built with the LT-1 RPO designation. It would take 22 years before the small block would surpass the original LT-1's power.
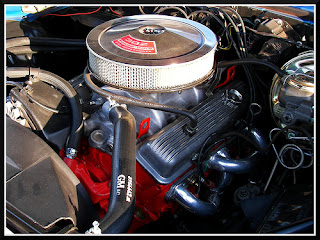
350 Chevy in a Corvette


 The 307
With power demands for the basic small block increasing the 283 witch was considered powerful only 10 years before was given a fresh work over with a 327 crankshaft. This didn't create a power monster, the engine was never available with any performance options. However,it doesn't take much to increase the small blocks power with just a few go fast goodies like a manifold and a 4 barrel carburetor and given the 3.25 in stroke it had an almost perfect rod/stroke ration for an accelleration engine. The 307 because the base engine for Chevrolet's passenger cars and truck line up.

Friday, December 07, 2012

The Small Block Chevrolet

Believe it or not,the initial design and groundwork for the small block Chevy was started in 1951. Development really started to take off when Ed Cole became chief engineer of the design team in 1952 and scrapped the first designs that came about. Making the new V-8 from Chevrolet as compact and light weight as possible was the goal. Now,the small block Chevy is by far the most popular engine of all time. No other engine has been built and installed in so many applications that the small block Chev.

  Ford had had it's V-8 out for almost 20 years at the time the idea of a V-8 Chevrolet came along. Olds,Cadillac,Chrysler,DeSoto and Dodge all had V-8's before Chevy. However,the innovations that came along with the new V-8 revolutionized the industry. And with it,a few new automotive terms would be coined,such as "small block" and "big block". The very first Chevy V-8 was the 265 CID. The block dimensions would remain basically unchanged for 30 years with only minor changes here and there. And believe it or not,almost everyone maintained a 4.4 inch bore center. so it comes as no surprise that every increase in displacement came as a serious engineering break through. The Block was 21 3/4" inches long and had a 9 inch deck height. Another thing that may be a bit surprising is that the main focus of building the V-8 was not for fuel economy or any type of efficiency but,performance and durability. One of the ways this was accomplished was reducing the amount of molds required for casting the block and other engine components. That allows for much greater precision when casting the block and reduces cost. It also helped to reduce weight,the complete machined V-8 block tipped the scales at 147 lbs. A full 16 lbs lighter than the inline 6 block. The fully assembled SBC weighed 531 lbs and was a full 41 lbs lighter than the fully assembled inline 6. The engine produced 162 horsepower with a 2 barrel and 180 with a 4 barrel carb. Remember that these horsepower ratings were gross and not net as the S.A.E. requires them to be now.


  The engine was also installed in a complete re-designed car for 1955 but,were talking engines here and now cars,there will be enough of that soon enough. However back then a well known magazine tested the new Chevy and it did 0-60 in 9.7,considered very quick for the day. The debut of the small block brought Chevy to the top of the NASCAR short tract points as well. And of course this became a selling feature touted by the dealerships to gain sales and it worked. The next year of production marked the introduction of a canister type oil filter. An increase in both cam lift and compression helped the 1956 265 to produce 205 horsepower. Another option available was called a 4 barrel Power Pak that increased power to 225 HP. Even with the success of the 265 work was already started on larger displacement small block.


   Now given that fact that the more power you have,the more you want it was only natural for some evolution to take place. The 265 block had plenty of cylinder wall so boring it .125 was easy. And along came the 283. Now if you think about it,the 283 does not sound like much given today's standards. At the time though it was state of the art technology and it also helped to bring us to where we are today in regards to the most popular engine ever. The 283 was an instant hit,so much so that 1957 was the last year of production for the 265. Now the 283 had a bore of 3.875 inches and maintained the 3 inch stroke. It produced 185 horsepower with a 2 barrel and 220 with the 4 barrel carburetor. The "Corvette V-8" was offered with a dual 4 barrel set up that produced 245 horsepower and 270 horsepower respectively. Ram Jet Fuel injection was also introduced in 1957 and the 283 produced one horsepower per cubic inch! The fuel injection design was also referred to as a "Dog House" system. Ordering one of these was very difficult but,when a very popular magazine finally did get to test the Corvette with the fuel injection they called it an "absolute jewel" and "instantly transformable into a roaring brute when pushed hard". They attributed this to the instant throttle response and drivability around town. The car did 0-60 in 5.7 seconds and ripped the quarter mile in 14.3 proving to be equal to larger displacement engines rated at 325 horsepower. In fact it beat the 392 hemi for times that year.

old 283 Chevy


 The introduction of the 348 "big block" Chevy in 1958 required a few new terms be added to the vocabulary of enthusiast for obvious reasons. The new block was not based on the original small block platform and was more than 100 lbs heavier. Some of the updates to the small block were changing to side mount engine mounts and cylinder walls were made thicker.The same basic options for the 283 remained for 1959 with the exception of the Ram Jet 283 producing 290 horsepower that year. Not to mention that for the past few years the small block Chevy had been proving it's self on the drag strip. Little did the designers know when they came up with the small block that they would create an engine that would be the starting point of millions of engine build ups over the next 50 years.
1957 RamJet Fuel Injected 283
 Ramjet mechanical fuel injection Engine installed in the 1957 Corvette


  Along came 1957,the most hyped up thing to come out of Chevrolet was the "Ramjet" The development allowed for 1 horsepower per cubic inch. The whole system was actually more of a pressurized carburetor. And it worked like a damn!  But,the $480 some price tag was considered exspensive at the time. And getting one of these for your 1957 Chevy proved very challenging The unit was also in very limited supply and would not even find it's way onto very many Corvettes as many including Hot Rod Magazine and Motor Life Claimed the Chevrolet was pre-mature in anouncing fuel injection but,at the time it sure got a lot of interest. Only a few ended up being sold publicly and even those were for racing. A grand total of 1040 Corvettes recived the Original Ram Jet Fuel Injection and a further 1500 or so passenger cars were also assmebled so equipt.
How Mechanical Fuel Injection works

No0w at this time the American auto makers were discouraged from making reference or even putting any type of emphasis on racing. It seams that the American Manufacturers Assc was scared of regulators in D.C. So the emphasis shifted to the performance aspect. And auto racing in the 50's created a perfect arena for this performance. And the 50's came to an end with the future of the small block Chevy looking bright.

Thursday, December 06, 2012

Painting Your Car

If you are restoring a vehicle, a milestone in the restoration process is when you have the vehicle painted. At this stage, although still far from finished, the project really starts to take shape. Depending on your skill level and ambition, you may wish to tackle the paint job yourself.
If you have never painted before, the idea of painting your vehicle may seem like a fun project, or it may seem overwhelming. Although there are proper techniques to spraying, nothing is out of the scope of a hobbyist that is willing to practice and learn. To get you started, JWT Automotive offers books,DVD's on Custom Paintingpaint guns, paints, technical advice, and all of the supplies you need to paint your vehicle. When you see your vehicle freshly painted, the sense of accomplishment is the greatest reward.

A large part of a successful paint job is directly related to the preparation efforts. Painting a vehicle is a tedious process that involves a lot of preparation. If you do not properly prepare the vehicle for paint, you will see defects in the finish and you may experience adhesion issues. In terms of preparation, we are referring to: rust repair, damage repair, bodywork, block sanding, using the correct products, keeping the surface clean, proper sanding, etc. If you are willing to put in the time and work, the end results can make it worth all your effort.
Everyone has different reasons for wanting to paint their car - maybe you like to be able to say you did "all" of the work yourself, maybe you can not afford to have it painted, maybe you want to learn something new, maybe you want to be certain of the work that is going into the vehicle before and during paint....and the list goes on. Regardless of your reasons, there are certain things that need to be considered for a successful paint job.


 GETTING STARTED

To get started, you need to develop a game plan. The key to a successful paint job is planning your steps, taking your time, and properly prepping the surface. If you are in a hurry, DO NOT attempt to paint your car. If you cut corners prepping the vehicle for paint, this will be seen in the final finish or shortly down the road. To properly paint a vehicle, there is a lot more involved than spraying paint onto the vehicle. When developing your game plan, here are several things to consider:
• Do you have a place to prep and paint the vehicle?
• Do you have (or are you willing to purchase) the needed tools to paint a vehicle?
• Will the vehicle be stripped to bare metal or are you going to paint over the existing finish?
• Are you painting the complete vehicle (door jambs, trunk area, underhood, etc) or only the outside?
• What type of paint do you plan on using? - Acrylic Enamel, Urethane, Acrylic Lacquer, Base coat/Clear coat, Water-based, etc.
• What brand of paint system are you going to use?

If you are considering the idea of painting your vehicle, first think of where you are going to prep and spray it. Do you have a dry place to store the vehicle while you are prepping it? Ideally, you will want to be spraying in a clean, dirt-free, temperature controlled environment. Are you going to rent a spray booth, paint in your garage, or paint in your driveway? Is it legal to spray a vehicle where you plan to paint? All of these factors must be considered before you think about picking up a paint gun. Tip - If it is illegal for you to paint your vehicle in the area you live, you can still strip it down and prep it for the body shop. This is a good way to save money.

Speaking of paint guns, you will need the proper equipment to paint a vehicle. At a bare minimum, you will need a paint gun, an air compressor that can meet the demands of your paint gun, and a moisture separator. The moisture separator will ensure that you have a dry air supply. Moisture in your air supply is an easy way to ruin a paint job. Another option is a turbine paint system, such as the Accuspray. These systems do not require an air compressor, and the turbine systems ensure that you have a dry air supply.

In addition to the spraying equipment, there is safety equipment that you will need. You will need a painter's suit, an approved respirator, goggles, and disposable nitrite gloves are a good idea. The chemicals in today's paints are dangerous and can be absorbed through your skin and eyes. When working with these chemicals, you must follow all precautions and make sure you use all of the required safety equipment.

PAINT GUNS

There are two general paint gun designs: gravity feed and siphon feed. Gravity feed guns have the cup mounted on top of the gun and use gravity (and air pressure) to feed the paint into the gun. Siphon feed guns have the cup mounted under the gun and use a pick-up tube to deliver the paint to the gun.
In addition to gravity feed and siphon feed designs, paint guns are commonly known as either HVLP (high volume low pressure) or conventional. HVLP paint guns pass a high volume of paint through the gun's nozzle at a lower pressure (as low as 10 psi at the air cap). Conventional paint guns require high pressure (60 psi or more) to spray the paint. HVLP paint guns generally have higher transfer efficiencies, meaning that they put more material on the item you are spraying. This results in less overspray and less wasted material. Some areas require that you paint with an HVLP paint gun or a compliant non-HVLP paint gun.
We recommend that you use a gravity-feed HVLP paint gun. With a siphon-feed gun, there is always a little material left in the bottom of the cup that doesn't get sprayed. The gravity-feed design allows you to spray the full cup of material. Also, you should consider using cup liners or the 3M PPS system. Both of these items will allow you to spray at different angles, even upside-down. AJGeneral offers a variety of paint guns from DeVilbiss, Binks, and Sharpe.

Depending on the type of paint you plan to spray, you may need additional tips & nozzle caps for the gun. Some paint guns come with tips and nozzle caps to spray heavy primers, while others are better suited for spraying lighter-bodied paints and clears. For lacquers, enamels, urethanes, base coats, and clear coats you will want a spray gun with a 1.3 - 1.5mm fluid tip. For spraying water-based automotive paints, you will want a spray gun with a 1.0mm fluid tip. For heavy paints and primers, a spray gun with a 1.8 - 2.2mm fluid tip is ideal.

TAKE IT APART OR NOT?

When deciding to paint your vehicle, how far do you plan on taking the vehicle apart? Are you going to remove the hood, trunk, doors, glass, etc, or are you going to tape it up and paint while it is together? Taking everything off allows you to make sure there is no hidden damage and it allows you to get paint into all of the nooks and crannies. However, you will have to deal with gapping the panels, reinstalling glass, replacing seals, etc.
If you decide to paint the vehicle while it is still together, remove as many of the small items as you can - antennae, door handles, lights, locks, wipers, etc. Nothing looks worse than a nice paint job that has overspray all over items that shouldn't have been painted. If you are leaving items on the car that are not going to be painted, be sure to use a quality automotive masking tape and masking paper....newspaper does not cut it. Newspaper is porous and can allow paint to get through to the surface below. Tip - To get paint under seals that are installed, an old trick is to take some nylon clothesline or coated wire and to put it under the seal and then mask off the seal. This will lift the seal enough to allow paint to spray between the seal and the body of the vehicle.


STRIPPING THE VEHICLE


Do you plan on stripping the vehicle to bare metal or painting over the existing finish? Stripping the vehicle to bare metal allows you to see what is hiding under the paint - rust, body filler, shoddy repairs, and other damage. You'd be surprised what has been found under existing layers of paint. Stripping the vehicle to bare metal also allows you to know exactly what products are being used. If you paint over an existing finish (this is perfectly acceptable for some applications), you never really know what is hiding under the surface. Also, if this finish was not properly prepped, your new coating may flake off due to the existing finish flaking off. If you do not know the history of the finish on the vehicle, it is generally a better idea to strip it to bare metal and start fresh. There is nothing worse than having a new paint job flake off or have rust start popping out due to shoddy repairs that were made under an existing finish.
If you decide to strip the vehicle to bare metal, there are several options - chemical paint strippers, chemical dipping, media blasting, and mechanical stripping. Each method has pros and cons.
Chemical paint strippers can quickly remove multiple layers of paint. Chemical strippers are available in aerosol and brush on applications, and in liquid and gel forms. Usually, multiple applications are required to fully strip the panel to bare metal. It is advisable to avoid seams, as stripper may seep out after you have painted your vehicle and lift your fresh paint if all of the stripper was not removed. Chemical stripping can be messy, but it is effective at removing multiple layers of paint. Be sure to read all warning labels, follow directions, and use appropriate safety equipment.
• Chemical dipping is done by professionals. This method is very effective and removes all paint, body fillers, seam sealers, and rust. It also strips the inside of panels. If the chemical is not fully cleaned from the vehicle, it can seep out and lift the new paint. Also, this method will clean the back sides of panels and other areas that are hard to access. If you can not treat the inside of panels, they can start rusting from the inside.

Media blasting is a method of stripping paint, rust, and body fillers by using abrasive blasting equipment. With this method, media (sand, poly abrasive, walnut shells, baking soda, slag, etc) is shot at the vehicle and it abrades the surface to remove the coatings. Different types of media are available for stripping coatings and rust. Depending on the media being used, care must be taken to avoid warping large flat panels. Also, abrasive can get into cracks and crevices. If this is not thoroughly cleaned, it could blow out and end up in the paint when spraying the vehicle. Media blasting can be used to quickly strip large areas of paint and rust.
Media blasting can be done at home with a siphon blaster or a pressure blaster. Pressure blasters are quicker than siphon blasters. Eastwood sells several models to suit your needs. Be sure to use appropriate safety equipment, including a NIOSH approved respirator and a blast hood.
• Mechanical stripping is another method of paint removal. It can be done by hand sanding with sand paper, or by using pneumatic or electric grinders and sanders. Sand paper, cleaning discs, stripping discs, and wire wheels are common methods. This process is effective, but it can take longer than other means of paint stripping.


PAINTING OVER AN EXISTING FINISH

When painting over an existing finish, the finish must be in good shape. Faded finishes are okay, but it should not be peeling, cracked, or otherwise damaged. If the vehicle has been repainted, it is recommended that you strip the vehicle down and start from bare metal. If you do decide to paint over the existing finish, wash the vehicle and then use a quality wax and grease remover on the surface. This will remove any wax that could cause adhesion problems. Now, you will want to wet sand the surface with 320-400 grit sandpaper. This will roughen the surface and allow your new finish to adhere. If there are any chips, dings, or scratches, repair them with a catalyzed glazing putty. Once you make these repairs, you should seal the entire vehicle with a quality sealer primer.
Generally, it is recommended that you stick with one brand's paint system throughout the entire painting process. However, there have been many successful paint jobs that have mixed products. If you decide to mix primers and topcoats from different manufactures, we recommend that you test for compatibility before you start spraying on your project. Tip - EverCoat Slick Sand is a versatile, sprayable polyester high-build primer that can be used with most types of top-coats. It can be applied over bare metal or prepped painted surfaces.

CHOOSING THE PAINT

Now you need to decide on the paint type and paint brand. Most paint manufacturers recommend that you use their entire paint systems - cleaners, primers, paints, and clear coats. This is to ensure that there are not any adverse reactions between different products. There are a large variety of paints available that can be used - acrylic lacquers, acrylic enamels, urethanes, base coat/clear coat, and water-based are quite popular today with automotive hobbyists. AJGeneral carries House of Kolor custom paints and Auto Air water-based paints.
For typical paint jobs, here is an example of the steps for something that has been stripped to bare metal:
• Wipe down surface with paint prep
• Epoxy primer
• Bodywork done on top of the epoxy primed surface
• Sealer primer
• 3-4 coats of base coat
• 3-5 coats of clear coat
(This is an example of the steps that products are commonly applied. Paint manufacturer's recommended products and application order may vary. Paint manufacturer's instructions should be followed.)
 Depending on the purpose of your project, you might select different types of paint. With restoration projects, many hobbyists opt for acrylic lacquer or acrylic enamel to replicate the factory finish. If you are looking for durability, urethanes, base coat/clear coat finishes and water-based finishes are great.

Before you start to spray, be sure to read the paint mixing instructions and paint gun instructions. Be sure that your paint gun is set-up to spray the type of finish you are using. If you have never painted before (or even if you have painted before), you may want to look into our Paintucation videos. These videos show you how to avoid common mistakes and give a wealth of information. Before spraying your project, practice, practice, practice. Spraying a fender is a lot different from spraying a whole vehicle. Spray your wheel barrow, lawn tractor, trash can, or go to a salvage yard and pick up some extra fenders, hoods, or doors. This will allow you to get the feel of spraying, and also allow you to practice with different air pressures and fan patterns. This is also a good way to learn the products you are spraying.

SPRAYING THE PAINT
When setting up your paint gun, hold the gun 6 inches from the surface and try to get a fan pattern that is approximately 6 inches for spraying automobiles. If you are spraying smaller objects, a 4 inch pattern is usually ideal. We recommend that you practice with different fan patterns before you begin spraying your project.
When spraying, be sure to keep the gun parallel to the surface you are spraying. If you are spraying a solid or metallic color, you should use a 50% overlap on each pass. For candies and pearls, you usually want to use a 75% overlap. When spraying, you should walk with the gun and keep your wrist firm. If you move your wrist, this will vary the gun's distance from the surface you are spraying, resulting in uneven coverage. A large part of spraying is developing a feel. The more you practice, the better you will become. There is a fine line between laying the paint on flat and texture-free, and running it off the panel. To get this feel, you must practice and become acclimated to your spray equipment and the products you are spraying.
Be realistic with your expectations of your first paint job. It probably won't be perfect. There might be dry spots, runs, dirt, and/or bugs. Take you time and remember that many of these problems can be corrected with color sanding and buffing. Use each paint job as a learning experience. With practice, the right equipment, the right products, and JWT Automotive's expert advice, you will be able to produce a paint job that you are proud of.

LS Series Engines

The engines that we call the "LS" came onto the street back in 1997. They were referred to as the Gen III Small Block. The iron versions were installed in the trucks and the Aluminum blocks were installed in the C5 Corvette. The next year the LS1 were installed in the Camaros and Firebirds. The displacement was slightly different with 346 cubic inches instead of 350.
 The Gen III spawned a high performance LS6 in 1999 that became standard in the Z06 Corvette. Then in 2005 the Gen IV came along. This engine had provisions cast into it that allowed for fuel saving ideas such as cylinder de-activation,larger displacements and new cam technology.Some of the performance versions were the LS2,LS3,LS7 and LS9 supercharged. Remember though the the first version of the LS7 came out in 1970-71 and was a 454 cubic inch engine.

The nickname "LS" was actually coined by racers and Hot Rodders,even while GM was continuing to call the engine family the Gen III and Gen IV. It became very apparent that the performance applications of this engine was almost limitless. The iron block engines finding their way into the trucks displaced 4.8L and 5.3L respectively. The all aluminum 6.0L and 6.2L engines were also installed in trucks. The car engines were the 5.3L,5.7L,6.0L,6.2L and 7.0L with some configured for front wheel drive.

 Gen III & Gen IV
In spite for the fact the there are differences between the two series of engines,they share some very common things,
  •  4.4" bore centers (the same as thew original small block chevy)
  • 6-bolt,cross bolted main caps
  • Center main thrust bearing
  • 9.24 inch deck height4-bolt per cylinder head bolt pattern
  • 0.842" lifter bore
  • Coil near plug ignition system (distributorless)
The biggest difference is cylinder bores on some engines of course and camshaft position sensor locations. They are on the front timing cover of the Gen IV blocks and top rear on the Gen III blocks. The Gen III engines featured 24X reluctor wheels and the Gen IV had the 58X reluctors. There is a high degree of interchangeability between the Gen III and the Gen IV. Cylinder heads,crankshafts,intake manifolds and more can be swapped between them however like it has been for over 50 years with the original small block it may be trial and error. Not every set of heads is going to bolt up to every intake manifold. For more info on it, How To Build High Performance Chevy LS1/LS6 V-8's is one of the best books out there. It gives more specific details on differences and interchangeability.

LS4
One of the most unique applications of the LS4 5.3L engine (323 C.I.D) is in the front wheel drive Impala SS and the Pontiac Grand Prix. The aluminum block with the low profile accessory system includes a flatten water pump design to accommodate the transverse mounting and produces 303 HP and 323 ft/lbs of torque.

LS1/LS6
The 5.7l 364 cubic inch engines were built from 1997 to 2004 (2005 in Australia) for the Camaro,Firebird,Corvette and GTO's. The LS6 came along in 2001 in the ZO6 Corvette and was built through 2005 were it found itself installed in the CTS-V Cadillac. Both the LS1 and LS6 share the same displacement. The LS6 featured an enhanced design for strength and better bay to bay breathing. The heads and intake manifold are also unique to the LS6.

LS2
2005 came along and the 6.0L 364 C.I.D. LS2 was installed in the GM performance cars like the Corvette,GTO and some or the SSR roadsters. And of course with the larger displacement came more power. The LS2 is one of the more adaptable engines of the Gen IV family. The LS1,LS6,LS3 and L92 heads work very well on it. The engine also featured a siamese bore.

LS3/L99
Debuting in the 2008 Corvette with a screaming 430 horsepower the 6.2L was the most powerful engine base ever to come out in the Corvette. The LS3 featured larger stronger siamese bores and Active Fuel Management on the L99 version. Offered in the Pontiac GXP G8 and the new 2010 Camaro. This engine displaces 376 cubic inches.

LSA
The little brother the the LS9,this supercharged 6.2L engine found its way into the CTS-V Cadillac. These engines feature hypereutectic pistons compared the the forged pistons of the LS9 and a smaller 1.9L supercharger with a different cooler design that helps the Caddy smoke the tires with 556 HP.

LS9
This is the most powerful engine Chevy produced. The LS9 is a supercharged 6.2L charge cooled 638 horsepower monster that powers the ZR1 Corvette. This block is strengthened and uses roto cast cylinder heads and a sixth generation 2.3L Roots supercharger and features a dry sump oiling system that mounts outside the engine to help with lubrication under extreme cornering. These engines are also hand built in Wixom,Mich.

LS7
The LS7 is the standard issue engine for the Z06 Corvette. This is the largest displacement small block ever offer in a production car by GM displacing 427 cubic inches. The LS7 uses siamese bored blocks for the 4.125" bores. Competition proven cylinder heads,titanium rods and intake valves help make this a 505 HP street tuned racing engine. These engines are also hand built.


Gen III and Gen IV Vortec Truck Engines
Typically it's been the car engines that have carried the LS designations when it comes to the Gen III and Gen IV engines. The engines installed in the trucks have been dubbed "Vortec" and usually use iron blocks and are smaller displacements then the blocks used in cars. And the 5.7L LS has never been available in the trucks.
   Here's the run down,

  • The 4.8L (293 C.I.D.) is the smallest displacement LS engine,features an iron block, a 3.78" bore and aluminum heads.
  • The 5.3L (327 C.I.D.) is the most common truck engine using the 3.78" bore and a 3.62" stroke.Later versions of this motor feature "Active Fuel Management". These engines are both aluminum and iron blocks.
  • The 6.0L (364 C.I.D.) are used in the 3/4 ton and 1 ton trucks. The iron block designation is LY6,aluminum designation is L76. This engine uses aluminum heads and Active Fuel Management.Some are equipt with variable valve timing.
  • The 6.2L (376 C.I.D) is referred to as the L92. This engine uses an aluminum block and cylinder heads and features variable valve timing. This motor is used in high performance applications like the GMC Yukon Denali and Cadillac Escalade


 Part#  Description  Liters/CID  HP Torque Bore  Stroke
 19165628  LS327  5.3/327  327  347  3.78  3.622
 17801267  LS1  5.7/346  350  365  3.898  3.622
 17801268  LS6  5.7/346  405  395  3.898  3.622
 19165484  LS2  6.0/364  400  400  4.0  3.622
 17802143  LS364/440  6.0/364  440  404  4.0  3.622
 12611022  L99  6.2/376  430  424  4.065  3.622
 19244549  LS376/480  6.2/376  485  475  4.065  3.622
 19171225  LS376/515  6.2/376  515  469  4.065  3.622
 19244097  LS3  6.2/376  430  424  4.065  3.622
 19211708  LSA  6.2/376  556  551 4.065  3.622
 19201990  LS9  6.2/376  638  604  4.065  3.622
 19171821  CT525  6.2/376  525  471  4.065  3.622
 19211710  LS7  7.0/427  505  470  4.125  4.00

C5R
The C5R blocks are no production block specially designed and developed for the Corvette racing program. These blocks feature a unique alloy blend of aluminum,and billet steel main caps and are machined with specialized specs. They also undergo a different testing to ensure strength. The siamese bore design allows for a displacement of 427 cubic inches. All LS series heads work of the C5R,however bear in mind that you want maximum air flow.

LSX Bowtie Block
2007 braught with it the new LSX block,it's a durable and affordable cast iron version designed to support very high performance applications and even has provisions for 6 bolt head fastening. 3.88 bores that get finished to 3.89" or even as large as the max 4.2". You have to keep in mind that the rotating assembly for a stroke larger than 4.125". Deck height on the LSX blocks are 0.020 taller than the production ls blocks. However the standard LS cylinder heads work with the LSX blocks. This block features a true priority main oiling system.

GTO Production Numbers

1964 2-door coupe 2-door sedan Convertible Tri-Power 389 4-bbl Total

18,422 7,384 6,644 8,245 24,205 32,405
1965 2-door coupe 2-door sedan Convertible Tri-Power 389 4-bbl Total

55,722 8,319 11,311 20,547 54,805 75,352

M/T


56,378

A/T


18,974
1966 2-door coupe 2-door sedan Convertible Tri-Power 389 4-bbl Total

73,785 10,363 12,798 19,045 389 4-bbl 96,946

M/T


61,279

A/T


35,667
1967 Production #'s
2-door coupe 65,176
2-door sedan 7,029
Convertible 9,517
400 4-bbl Ram Air 751
400 4-bbl HO 13,827
400 2-bbl 2,967
400 4-bbl STD 64,177
Manual transmission 39,128
Automatic transmission 42,594
Total Production 81,722


1968 2 door coupes& sedans convertibles
400 Ram Air*, M/T 757 92
400 Ram Air**, A/T 183 22
400 HO, M/T 6,197 766
400 HO, A/T 3,140 461
400 STD, M/T 25,371 3,116
400 STD, A/T 39,215 5,091
400 2-bbl, M/T 0 0
400 2-bbl, A/T 2,841 432
Total Production *400 RA II, M/T (all styles) 199 **400 RA II, A/T (all styles) 47 77,704 9,980
1969 Sport Coupes Convertibles
400 RAIV, M/T 549 (4 Judges)45
400 RAIV, AT 151 (No Judges)14
400 RAIII, M/T 6,143 249
400 RAIII, A/T 1,986 113
400 STD, M/T 22,032 2,415
400 STD, A/T 32,744 4,385
400 2-bbl, M/T 0 0
400 2-bbl, A/T 1,246 215
Total Production 64,851
Total Hardtop Judges 6,725
Total Convertible Judges
108
1970 Sport Coupe Convertible
400 RAIV, M/T 627 24
400 RAIV, A/T 140 13
400 RAIII, M/T 3,054 174
400 RAIII, A/T 1,302 114
400 STD, M/T 9,348 887
400 STD, A/T 18,148 2,173
455 4-bbl, M/T 1,761 158
455 4-bbl, A/T 1,986 241
Total Hardtop Judges 3,797
Total Convertible Judges
162
Total Production 36,366 3,783
1971 Sport Coupe Convertible
400 STD, M/T 2,011 79
400 STD, A/T 6,421 508
455 STD, M/T 0 0
455 STD, A/T 534 43
455 HO, M/T 476 21
455 HO, A/T 412 27
Total Hardtop Judges 357
Total Convertible Judges
17
Total Production 9,854 678
1972 Coupe Sedan
400 STD, M/T 59 1,519
400 STD, A/T 60 3,248
455 STD, M/T 0 0
455 STD, A/T 5 235
455 HO M/T 3 310
455 HO A/T 7 325
Total Production 134 5,673
1973 Coupe Sedan
400 4-bbl, M/T 187 926
400 4-bbl, A/T 282 2,867
455 4-bbl, M/T 0 0
455 4-bbl, A/T 25 519
Total Production 494 4,312
1974 Coupe hatchback
350 4-bbl, M/T 2,487 687
350 4-bbl, A/T 2,484 1,036
Total Production 5,335 1,723

Nova & Chevy II Production Numbers


1962 Style L4 L6 V-8
Chevy II 100 sedan, 2-door 0111/0211 11,500* 35,500* 0
Chevy II 100 sedan, 4-door 0169/0269

0
Chevy II 100 wagon, 4-door 0135/0235

0
Chevy II 300 sedan, 2-door 0311/0411 92,800**
0
Chevy II 300 sedan, 4-door 0369/0469

0
Chevy II 300 wagon, 4-door 0335/0435

0
Chevy II Nova 400 sedan, 2-door 0411
??? 0
Chevy II Nova 400 coupe, 2-door 0437 0 59,568 0
Chevy II Nova 400 convert, 2-door 0467 0 23,741 0
Chevy II Nova 400 sedan, 4-door 0469 0 ??? 0
Chevy II Nova 400 wagon, 4-door
0 ??? 0
Total Production=326,607 *Approx. total for all 100s. **Approx. total for all 300s.


Production totals were recorded by body style only, with no breakdown for engine or series.
2-door sedan-44,390
4-door sedan-139,004
4-door wagon-59,886
1963 Style # L4 L6 V-8
Chevy II 100 sedan, 2-door 0111/0211 50,400*
0
Chevy II 100 sedan, 2-door 0169/0269

0
Chevy II 100 wagon, 4-door 0135/0235

0
Chevy II 300 sedan, 2-door 0311/0411 78,800*
0
Chevy II 300 sedan, 4-door 0369/0469

0
Chevy II 300 wagon, 4-door 0335/0435

0
Chevy II Nova coupe, 2-door 0437 0 87,414*** 0
Chevy II Nova 400 convert, 2-door 0467 0 24,823*** 0
Chevy II Nova 400 sedan, 4-door 0469 0 58,862*** 0
Chevy II Nova 400 wagon, 4-door 0435 0 ??? 0
Total Production=334,816 *Approx. total for all 100s. **Approx. total for all 300s. ***Includes 42,432 SS models.


Production totals were recorded by body style only, with no breakdown for engine or series.
2-door sedan-44,390
4-door sedan-139,004
4-door wagon-59,886

1964 Style # L4 L6 V-8
Chevy II 100 sedan, 2-door 0111/0211 53,100*

Chevy II 100 sedan, 4-door 0169/0269 0

Chevy II 100 wagon, 4-door 0135/0235 0

Chevy II Nova sedan, 2-door 0411 0 102,900
Chevy II Nova coupe, 2-door 0437 0

Chevy II Nova sedan, 4-door 0469 0

Chevy II Nova wagon, 4-door 0435 0

Chevy II Nova SS coupe, 2-door 0447 0 10,576
Total Production=191,691 *Approx. total for all 100s


Production totals were recorded by body style only, with no breakdown for engine or series.
2-door sedan-40,348
2-door coupe-30,827 (This includes 10,576 SS models.)
4-door sedan-84,846
4-door wagon-35,670

1965 Style # L4 L6 V-8
Chevy II 100 sedan, 2-door 1111/1311 1,300* 39,200*
Chevy II 100 sedan, 4-door 1169/1369


Chevy II wagon, 4-door 1135/1335 0

Chevy II Nova coupe, 2-door 1537 0 51,700**
Chevy II Nova sedan, 4-door 1569 0

Chevy II Nova wagon, 4-door 1535 0

Chevy II Nova SS coupe, 2-door 1737 0 9,100**
Total Production=113,700 (approx.) *Approx. total for all 100s. **Approx. total for all series.


Production totals were recorded by body style only, with no breakdown for engine or series.
2-door coupe-28,380 (This includes approx. 9,100 SS models.)
4-door wagon-21,500
1966 Style # L4 L6 V-8
Chevy II 100 sedan, 2-door 1111/1311 44,500*
2,500*
Chevy II 100 sedan, 4-door 1169/1369


Chevy II 100 wagon, 4-door 1135/1335


Chevy II Nova coupe, 2-door 1537 0 54,300** 19,600**
Chevy II Nova sedan, 4-door 1569 0

Chevy II Nova wagon, 4-door 1535 0

Chevy II Nova SS coupe, 2-door 1737 0 6,700* 16,360*
Total Production=177,485 *Approx. total for all 100s. **Approx. total for all series.


1967 Style # L4 L6 V-8
Chevy II 100 sedan, 2-door 1111/1311 34,200*
1,700*
Chevy II 100 sedan, 4-door 1169


Chevy II 100 wagon, 4-door 1135/1335


Chevy II Nova coupe, 2-door 1537 0 34,400** 13,200**
Chevy II Nova sedan, 4-door 1569 0

Chevy II Nova wagon, 4-door 1535 0

Chevy II Nova SS coupe, 2-door 1737 0 1,900* 8,200*
Total Production=105,858 *Approx. total for all 100s. **Approx. total for all series


1968 Style # L4 L6 V-8
Chevy II Nova sedan, 2-door 1127/1327/1427 1,270 146,300 53,400
Chevy II Nova sedan, 4-door 1169/1369/1469 (total) (total) (total)
Total Production=200,970*


*This includes 6,571 SS models (5,670 L48 350/295 hp models, 234 L34 396/350 hp
models, and 667 L78 396/375 hp models.

1969 Style # L4 L6 V-8
Nova sedan, 2-door 1127/1327/1427 6,103 157,400 89,900
Nova sedan, 4-door 1169/1369/1469 (total) (total) (total)
Total Production=269,988*


*This includes 17,564 SS models (10,355 L48 350/300 hp models, 1,947 L34 396/350 hp
models, 4,951 L78 396/375 hp models, and 311 L89 396/375 hp models with aluminum heads.
1971 Style # L4 L6 V-8
Nova sedan, 2-door 1327/1427 o 65,891 77,344*
Nova sedan, 4-door 1369/1469 o 29,037 22,606
Total Production=194,878 *This includes 7,015 SS models with L48 350/270 hp V8.


1972 Style L4 L6 V-8
Nova sedan, 2-door 1X27 0 96,740 163,475*
Nova sedan, 4-door 1X69 0 43,029 46,489
Total Production=349,733 *This includes 12,309 SS models with L48 350/200 hp V8.


1973 Style # L4 L6 V-8
Nova sedan, 2-door 1X27 0 54,140 81,679
Nova hatchback, 2-door 1X17 0 11,005 33,949
Nova sedan, 4-door 1X69 0 27,440 32,843
Nova Custom sedan, 2-door 1Y27 0 6,336 52,042
Nova Custom hatchback, 2-door 1Y17 0 3,172 42,886
Nova Custom sedan, 4-door 1Y69 0 4,344 19,673
Total Production=369,511* *This includes 35,542 SS models.


1974 Style # L4 L6 V-8
Nova sedan, 2-door 1X27 0 87,399 72,558
Nova hatchback, 2-door 1X17 0 13,722 20,627
Nova sedan, 4-door 1X69 0 42,105 32,017
Nova Custom sedan, 2-door 1Y27 0 11,115 39,912
Nova Custom hatchback, 2-door 1Y17 00 9,631 36,653
Nova Custom sedan, 4-door 1Y69 0 7,458 17,340
Total Production=390,537* *This includes 21,419 SS models.


Chevelle Production Numbers


1964 V-6 V-6 V-8 V-8

Model Production Model Production
Chevelle 300 sedan 5311 17,965 5411 4,593
Chevelle 300 wagon, 2-door 5315 1,609 5415 1,101
Chevelle 300 wagon, 4-door 5335 7,358 5435 5,423
Chevelle 300 sedan, 4-door 5369 35,000 5469 10,718
El Camino 5380 4,430 5480 4,500
Malibu, 4-door wagon 5535 6,374 5635 15,011
Malibu, Sports coupe 5537 23,982 5637 45,019
Malibu, 4-door wagon 5545 1,808 5645 5,400
Malibu, convertible 5567 4,005 5667 7,962
Malibu, 4-door sedan 5569 34,158 5669 33,940
Custom El Camino 5580 3,042 5680 20,576
Super Sport, coupe 5737 8,224 5837 57,445
Super Sport, convertible 5767 1,551 5867 9,640
Total Production 387,119 (includes 16,285 Canadian-built cars)


1965 V-6 V-6 V-8 V-8

Model Production Model Production
Chevelle 300 sedan, 2-door 131115 11,528 132115 2,004
Chevelle 300 wagon, 2-door 131155 1,015 132155 653
Chevelle 300 sedan, 4-door 131695 14,924 132695 3,060
Chevelle 300 Deluxe, 2-door sedan 133115 9,391 134115 2,672
Chevelle 300 Deluxe, 4-door wagon 133355 6,314 134355 4,751
Chevelle 300 Deluxe, 4-door sedan 133695 22,566 134695 6,911
El Camino 133805 4,392 134805 5,935
Custom El Camino 135805 2,367 136805 22,030
Malibu, 4-door wagon 135355 6,500 136355 18,373
Malibu, 2-door coupe 135375 25,032 136375 55,634
Malibu, convertible 135675 3,388 136675 7,249
Malibu, 4-door sedan 135695 27,940 136695 32,877
Custom El Camino 135805 2,367 136805 22,030
Super Sport, coupe 137375 7,452 138375 64,532
Super Sport, convertible 137675 1,133 138675 7,995
Total Production 397,750 (includes 19,132 Canadian-built cars)


1966 V-6 V-6 V-8 V-8

Model Production Model Production
Chevelle 300 sedan, 2-door 131116 11,468 132116 2,135
Chevelle 300 sedan, 4-door 131696 11,869 132696 3,193
Chevelle 300 Deluxe, 2-door sedan 133116 9,176 134116 3,005
Chevelle 300 Deluxe, 4-door wagon 133356 5,183 134356 5,028
Chevelle 300 Deluxe, 4-door sedan 133696 17,935 134696 7,535
El Camino 133806 3,424 134806 5,897
Malibu, 2-door coupe 135176 28,180 136176 130,540
Malibu, 4-door wagon 135356 3,757 136356 17,978
Malibu, 4-door sedan 135396 5,122 136396 19,905
Malibu, convertible 135676 2,549 136676 11,636
Malibu, 4-door sedan 135696 16,428 136696 27,351
Custom El Camino 135806 1,461 136806 24,337
Super Sport, coupe 138176 0 138176 66,843
Super Sport, convertible 138676 0 138676 5,429
Total Production 471,052 (includes 23,688 Canadian-built cars)


1967 V-6 V-6 V-8 V-8

Model Production Model Production
Chevelle 300 sedan, 2-door 131117 9,792 132117 1,903
Chevelle 300 sedan, 4-door 131697 10,093 132697 2,860
Chevelle 300 Deluxe, 2-door sedan 133117 6,578 134117 2,104
Chevelle 300 Deluxe, 4-door wagon 133357 3,604 134357 3,808
Chevell 300 Deluxe, 4-door sedan 133697 12,686 134697 4,937
El Camino 133807 2,963 134807 5,387
Malibu, 2-door coupe 135177 25,261 136177 141,161
Malibu, 4-door wagon 135357 1,945 136357 11,715
Malibu, 4-door sedan 135397 2,650 136397 12,366
Malibu, convertible 135677 1,390 136677 8,061
Malibu, 4-door sedan 135697 11,278 136697 25,636
Custom El Camino 135807 1,098 136807 25,382
Concours, 4-door wagon 137357 379 138357 5,920
Super Sport, coupe 138177 0 138177 59,685
Super Sport, convertible 138677 0 138677 3,321
Total Production 403,963 (Canadian figures unavailable)


1968 V-6 V-6 V-8 V-8

Model # Production Model # Production
Chevelle 300 sedan, 2-door 131278 9,733 132278 2,919
Nomad wagon, 4-door 131358 6,340 132358 4,930
Chevelle 300 Deluxe sedan, 2-door 133278 5,661 134278 3,796
Nomad Custom wagon, 4-door 133358 2,830 134358 7,420
Chevelle 300 Deluxe, 2-door coupe 133378 4,534 134378 6,803
Chevelle 300 Deluxe, 4-door sedan 133698 15,307 134698 7,064
Nomad Custom wagon, 4-door 134458 0` 134458 753
El Camino 133808 2,757 134808 6,082
Malibu, 4-door wagon 135358 1,314 136358 13,739
Malibu, 2-door coupe 135378 20,561 136378 180,401
Malibu, 4-door sedan 135398 1,949 136398 15,069
Malibu, 4-door wagon 135458 5 136458 1,049
Malibu, convertible 135678 835 136458 6,959
Malibu, 4-door sedan 135698 9,737 136698 30,772
Custom El Camino 135808 1,072 136808 26,690
Concours, 4-door wagon 137358 210 138358 4,088
Concours, 4-door wagon 138458 0 138458 505
Super Sport, 2-door coupe 138378 0 138378 55,309
Super Sport, convertible 138678 0 138678 2,286
El Camino SS 138808 0 138808 5,190
Total Production 464,669 (Canadian figures unavailable)


1969 V-6 V-6 V-8 V-8

Model # Production Model # Production
Nomad wagon, 4-door 131359 3,806 132359 4,175
Nomad wagon, 4-door 131369 1,725 132369 3,446
Chevelle 300 Deluxe sedan, 2-door 133279 8,238 134279 5,620
Chevelle 300 Deluxe sedan, 4-door 133699 9,399 134699 8,198
Chevelle 300 Deluxe coupe, 2-door 133379 3,321 134379 7,181
Greenbrier wagon, 4-door 133359 612 134359 2,769
Greenbrier wagon, 4-door 133369 732 134369 4,324
Greenbrier wagon, 4-door 134469 0 134469 2,169
El Camino 133809 2,193 134809 6,407
Malibu, 2-door coupe 135379 14,724 136379 286,162
Malibu, 4-door sedan 135399 1,316 136399 16,956
Malibu, convertible 135679 484 136679 8,443
Mlibu, 4-door sedan 135699 6,970 136699 32,063
Concours, 4-door wagon 135369 546 136369 10,898
Custom El Camino 135809 785 136809 39,000
Concours, 4-door wagon 136469 0 136469 3,063
Concours Estate, 4-door wagon 138369 0 138369 5,236
Concours Estate, 4-door wagon 138469 0 138469 2,391
Total Production 503,352 (Canadian figures unavailable) (86,307 models with Z25 S.S. option)


1970 V-6 V-6 V-8 V-8

Model # Production Model # Production
Nomad wagon, 4-door 131360 4,315 132360 7,151
Chevelle 300 Deluxe coupe, 2-door 131370 6,119 134370 8,003
Chevelle 300 Deluxe sedan, 4-door 133690 4,546 134690 5,177
Greenbrier wagon, 4-door 133360 877 134360 5,503
Greenbrier wagon, 4-door 134460 0 136460 1,798
El Camino 133800 1,303 134800 5,137
Malibu, 2-door coupe 135370 12,256 136370 289,622
Malibu, 4-door sedan 135390 904 136390 20,575
Malibu, convertible 135670 381 136670 7,141
Malibu, 4-door sedan 135690 7,525 136690 37,401
Concours, 4-door wagon 135360 442 136360 11,567
Concours, 4-door wagon 136460 0 136460 2,906
Custom El Camino 135800 539 136800 40,728
Concours Estate, 4-door wagon 138360 0 138360 3,833
Concours Estate, 4-door wagon 138460 0 138460 2,220
Monte Carlo, 2-door coupe 138570 0 138570 145,975
Total Production 633,944 (includes 45,923 Canadian-built cars)


1970-53,599 models equipped with Z25 SS-396 equipment
 -8,733 models equipped with Z15 SS-454 equipment
-3,823 Monte Carlo models equipped with Z20 SS-454 equipment

1971 V-6 V-6 V-8 V-8

Model # Production Model # Production
Nomad wagon, 4-door 131361 2,801 132361 6,528
Chevelle coupe, 2-door 133371 6,660 134371 17,117
Chevelle sedan, 4-door 133691 6,621 134691 9,042
Greenbrier wagon, 4-door 134361 0 134361 6,128
Greenbrier wagon, 4-door 134461 0 134461 2,129
El Camino 133801 1,058 134801 4,506
Malibu, 2-door coupe 135371 6,220 136371 189,970
Malibu, 4-door sedan 135391 4,241 136691 37,385
Malibu, convertible 136671 0 136671 5,089
Malibu, 4-door Sports sedan 136391 0 136391 20,775
Concours, 4-door wagon 136361 0 136361 12,716
Concours, 4-door wagon 136461 0 136461 4,276
Concours Estate, 4-door wagon 138361 0 138361 4,502
Concours Estate, 4-door wagon 138461 0 138461 3,219
Custom El Camino 136801 0 136801 36,042
Monte Carlo, 2-door coupe 138571 0 138571 112,599
Total Production 387,025 (includes 18,262 Canadian-built cars)


1971-19,293 models equipped with Z15 SS equipment
-9,502 models equipped with SS-454 equipment
-1,919 Monte Carlo equipped with Z20 SS-454 equipment
1972 V-6 V-6 V-8 V-8

Model # Production Model # Production
Nomad wagon, 4-door 1B36D2 2,956 1B37_2 7,768
Chevelle coupe, 2-door 1C37D2 6,993 1C37_2 22,714
Chevelle sedan, 4-door 1C69D2 6,764 1C69_2 12,881
Greenbrier wagon, 4-door 1C36D2 0 1C36_2 6,975
Greenbrier wagon, 4-door 1C46D2 0 1C46_2 2,370
El Camino 1C80D2 1,307 1C80_2 5,481
Malibu, 2-door coupe 1D37D2 4,790 1D37_2 207,598
Malibu, 4-door Sport sedan 1D39D2 0 1D39_2 24,192
Malibu, 4-door sedan 1D69D2 3,562 1D69_2 45,013
Malibu, convertible 1D67D2 0 1D67_2 4,853
Concours, 4-door wagon 1D36D2 0 1D36_2 17,968
Concours, 4-door wagon 1D46D2 0 1D46_2 6,560
Custom El Camino 1D80D2 0 1D80_2 50,359
Concours Estate, 4-door wagon 1H46D2 0 1H46_2 5,331
Concours Estate, 4-door wagon 1H46D2 0 1H46_2 4,407
Monte Carlo, 2-door coupe 1H57D2 0 1H57_2 180,819
Total Production 450,842 (includes 35,875 Canadian-built cars)


1972-24,946 models equipped with Z15 equipment
-5,333 models equipped with SS-454 equipment